
.png)
Dam Right! | A Guide to Water Inflated Barriers
- Deborah McLellan
- May 20, 2022
- 3 min read
Updated: Mar 24, 2023

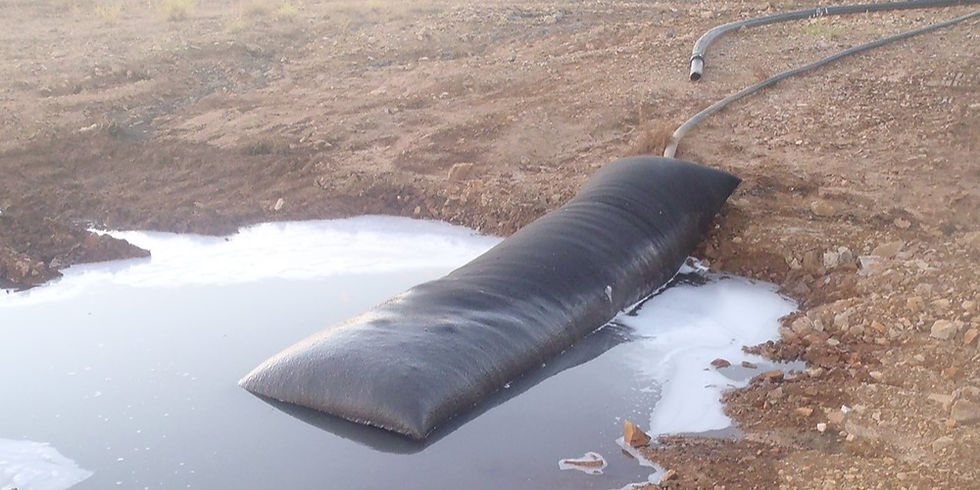
Water inflated barriers or dams are cylindrical tubes typically made of industrial grade PVC, that when filled with water work as a barrier that can resist both external and internal pressures.
Though tube like in structure, these barriers are constructed with one or two panels in the interior that work to create tension to prevent the barrier from rolling once inflated.
Typically used in projects that involve outfalls, water intakes around rivers or for shoreline isolation during erosion repairs. They can also be utilized for flood control and are a common sight during spring runoff.

Water inflated dams are a popular choice in these types of applications as they are much less cumbersome and labour intensive than the use of sand or aggregate filled bulk bags, earthen berms, or rigid coffer dam systems. They are also incredibly easy to transport, install, and dismantle – so much so that many companies and municipalities will include them in their emergency kits. Plus, when drained properly and checked for leaks they can be rolled up and stored for future use.
INSTALLATION
When installing a water inflated barrier, it is highly recommended that a site evaluation is performed first and foremost. Inspection of the location will provide valuable information to determine the proper configuration and conditions on which to install the barrier.


The ground, creek bed or shoreline should be inspected for, and removed of all sharp or irregular objects that could have the potential to cause abrasion or punctures to the barrier. Sandbags are often used as a protective layer as good practice. Unfold or rollout the barrier according to the site plan and configuration, as the dam must be correctly positioned prior to filling. Once laid out, the fill/drain ports should be clearly visible near the center and along the top of the dam. Connect the pump to one fitting near the mid-section and fill with any available water source, while leaving the other fitting open for venting. Once filled, cap off both ports – do not attempt to move the barrier once it is full.
CONFIGURATIONS & CONSIDERATIONS
There are multiple possible configurations for a water inflated barrier system.

Since the barriers can be linked together by overlapping the ends it is possible to form an extended barrier of any length. Overlap distance must be equal to the inflated height plus 12”, so a dam with the inflated height of 5’ would require an overlap of 6’.
Water depth is an important consideration when choosing and installing a water inflated barrier. The maximum water depth must not exceed 75% of the inflated dam height. For example, a 4’ dam is only good for use in 3’ of water.

If the placement is required on uneven ground, the slope must not exceed 8.3% (1:12). The portion of the dam located at the lowest elevation can be inflated to the specified depth. Do not over-inflate!
Sandbags are a common supplementary product needed for the installation and utilization of a water inflated barrier. Not only can they be used to protect the plastic from sharp objects but also to create stability while the barrier is inflated or as an additional barrier for any leakage from flowing back in or percolation from ground water.
These installation procedures are general and can vary from manufacturer to manufacturer. Please familiarize yourself with the installation instructions for your particular dam.
Cross Country Canada Supplies and Rentals has extensive experience with water inflated dams. Please contact us for solutions to all of your water management challenges!


Comments